Automile offers the cheapest ELD solution that you can use right out of the box. It is the perfect option for low-budget fleets and still offers complete and comprehensive logging functionality with full DOT and FMCSA compliance.
Installation is fast and easy with the Automile ELD kit. You can get going in under 20 seconds so long as there are no hurdles during installation. Here is a step by step ELD guide on how to get started with Install and Automile the Automile hardware and software solutions.
Automile ELD Kit
With Automile, everything has been kept very simple. The goal of keeping things cheap makes everything straightforward. Unlike many other systems that are too complex for the veteran trucker, Automile provides a system that is even easier than paper HOD logging.
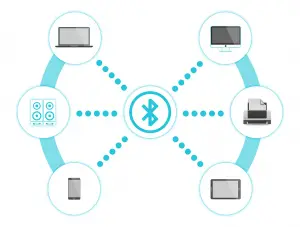
The kit includes only one device, which is the Automile Box. The driver or trucking company supplies a mobile device enabled with Bluetooth connectivity and a working data plan. The Box works through an OBD-II, which is usually present in small trucks as opposed to the larger JPorts found in trailer trucks.
Get Started With Automile
If you’re interested in the affordable logging solution offered by Automile, here is what you can do:
- Visit Automile’s website here and enter your company details.
- You will receive a welcome email and text message with instructions on how to access your account, including login credentials.
- You can now order the Automile package and get it delivered within three days.
- In the meantime, go to the Automile web application. Here, you can set up your company profile. The hamburger menu on the top right corner allows you to access options such as accessing driver profiles, route and map data, message inbox, and more.

Once you receive the Automile Box, install it as follows:
- Check the underside of your vehicle’s dashboard for the OBD-II port. It can also be found in other places such as on the side panels, above the foot pedals, on the steering column, or hidden within a plastic cover.
- Once you find it, plug in the Automile Box.
- Turn on your ignition.
- Launch the Automile App on your mobile device and turn on Bluetooth.
- Pair the Box and your mobile device.
- Drive around for about 20 minutes to allow the device and your device to sync. During this period, the data collected may not be accurate.
After the initial drive, you are now ready to view your reports, driving data, fuel consumption, and more. The driver will be able to login to the app, start and end sessions, and more.
If you want to install it in a truck with a JPort ECM port, do the following:
- Purchase an OBD-II port replicator cable. You can buy it on Amazon or in a vehicle parts store near you.
- Remove the panel covering the OBD port on your dashboard.
- Attach the replicator cable to the existing port connector.
- Attach the Automile Box to the OBD port.
- Push back in the cables as best as you can and replace the dashboard panel.
You can now relax because your Automile ELD is working perfectly. Use your mobile device to get your reports, view driving performance, and more.
Article submitted by Justin Grau – CMO for BestELDDevices.com
Learn More
- How to Install LoadTrek ELD
- How to Install a Floodlight
- Getting Started with iGlobal ELD
- How to Install the TruckingOffice ELD
- How to Install the Rand McNally ELD System
- NexTraq ELD Complete Installation Guide
- How to Install the Coretex ELD System in Your Truck
- TrackSmart ELD Installation Guide
- How to Install AwareGPS ELD System
