If you are using an iPhone, you must have thought about enabling VPN For iPhone to mask your IP Address so that you could access certain data online. But do you have all the information on VPN? What it is and what are its uses? And why is it so necessary to use?
VPN is a Virtual Private Network which creates a secure and encrypted connection. This enables the user to not be worrying about the hackers, or any other person who might steal their information. No one would be able to see what you are doing if you have enabled a VPN in your iPhone.
How To Setup VPN On iPhone For Free
Fist you will have to register to a VPN client provider you can find on our blog here
Once you have registered for the VPN, you have to enable the VPN in your iPhone.
You can register here -> Register Free
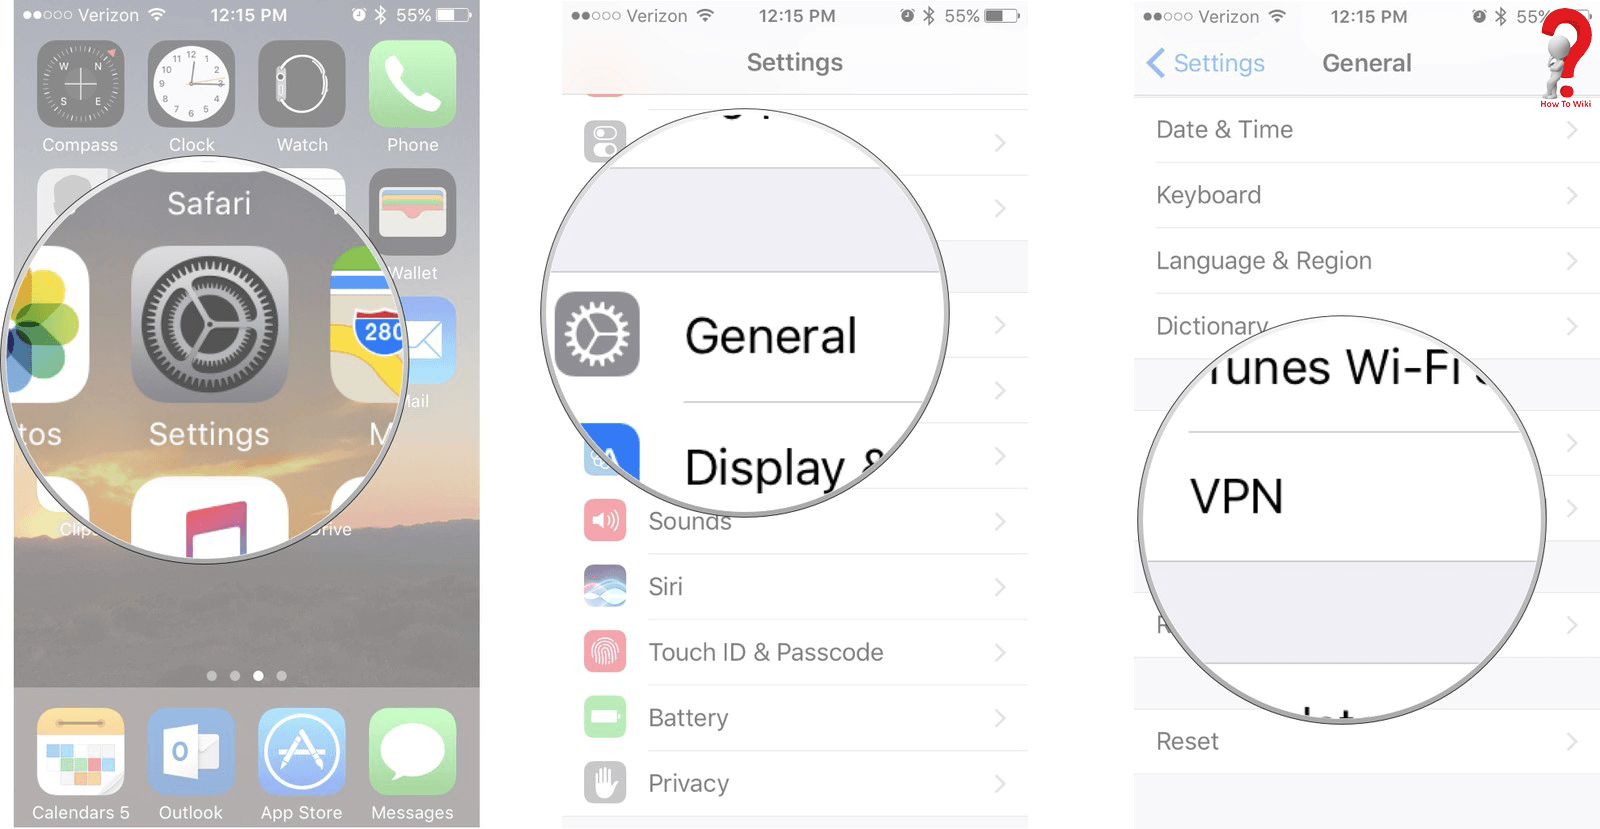
#1 Go to the settings page of your iPhone from your home screen
#2 Tap on the option for General settings
#3 Tap on the VPN option, this will redirect you to the VPN setting page
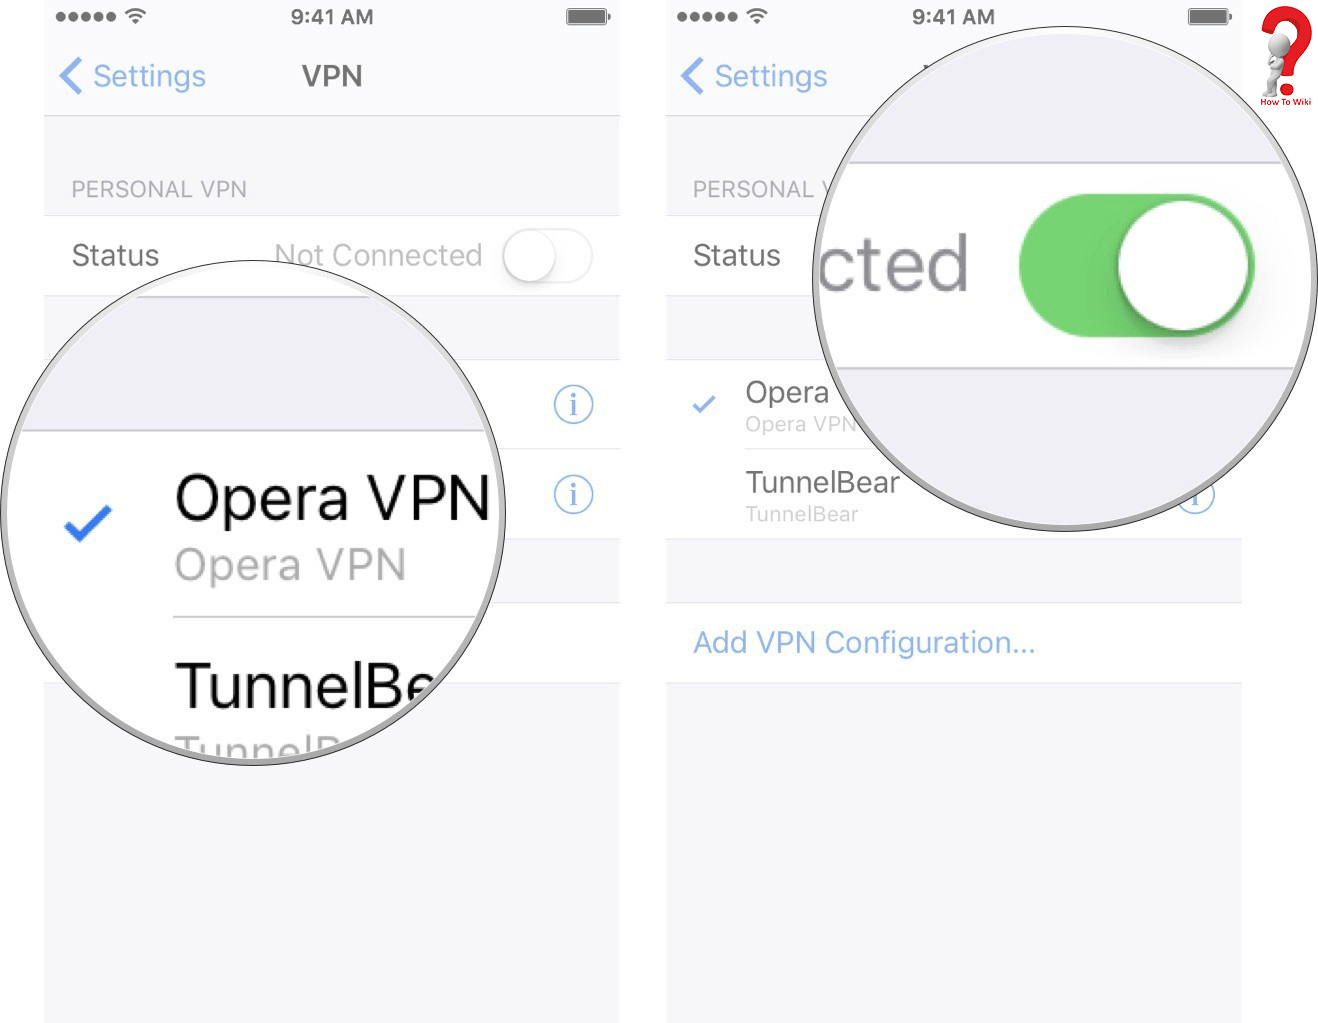
#4 If you have more than one option for your VPN clients, select the one that you want to use
#5 you have to toggle the VPN status switch on to enable it
Manually configure the VPN client in your iPhone ~
For this, keep the login information for the VPN client at hand
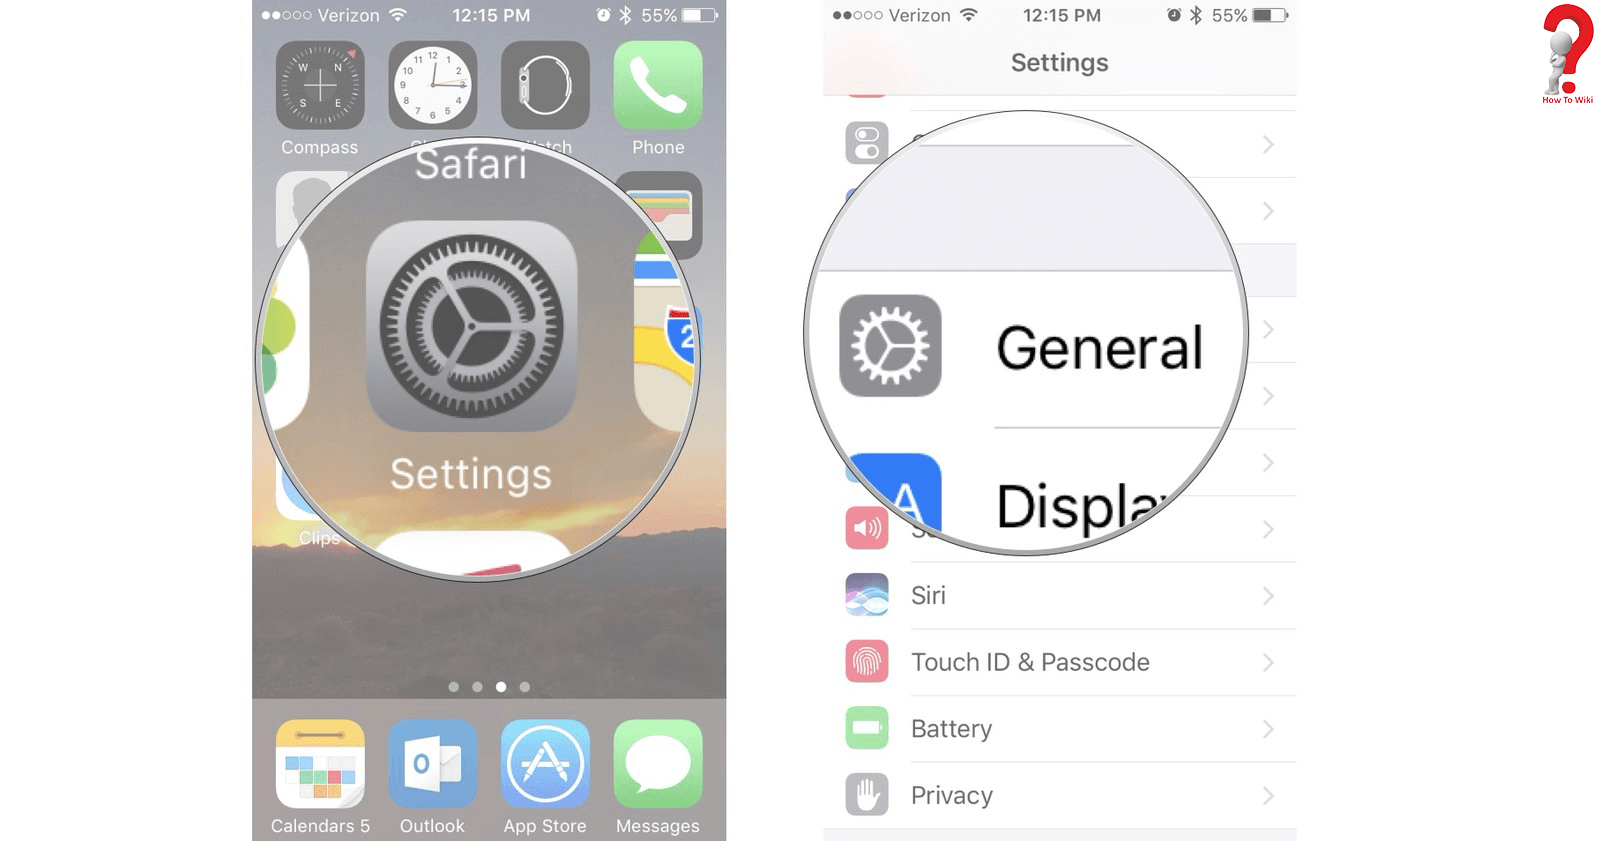
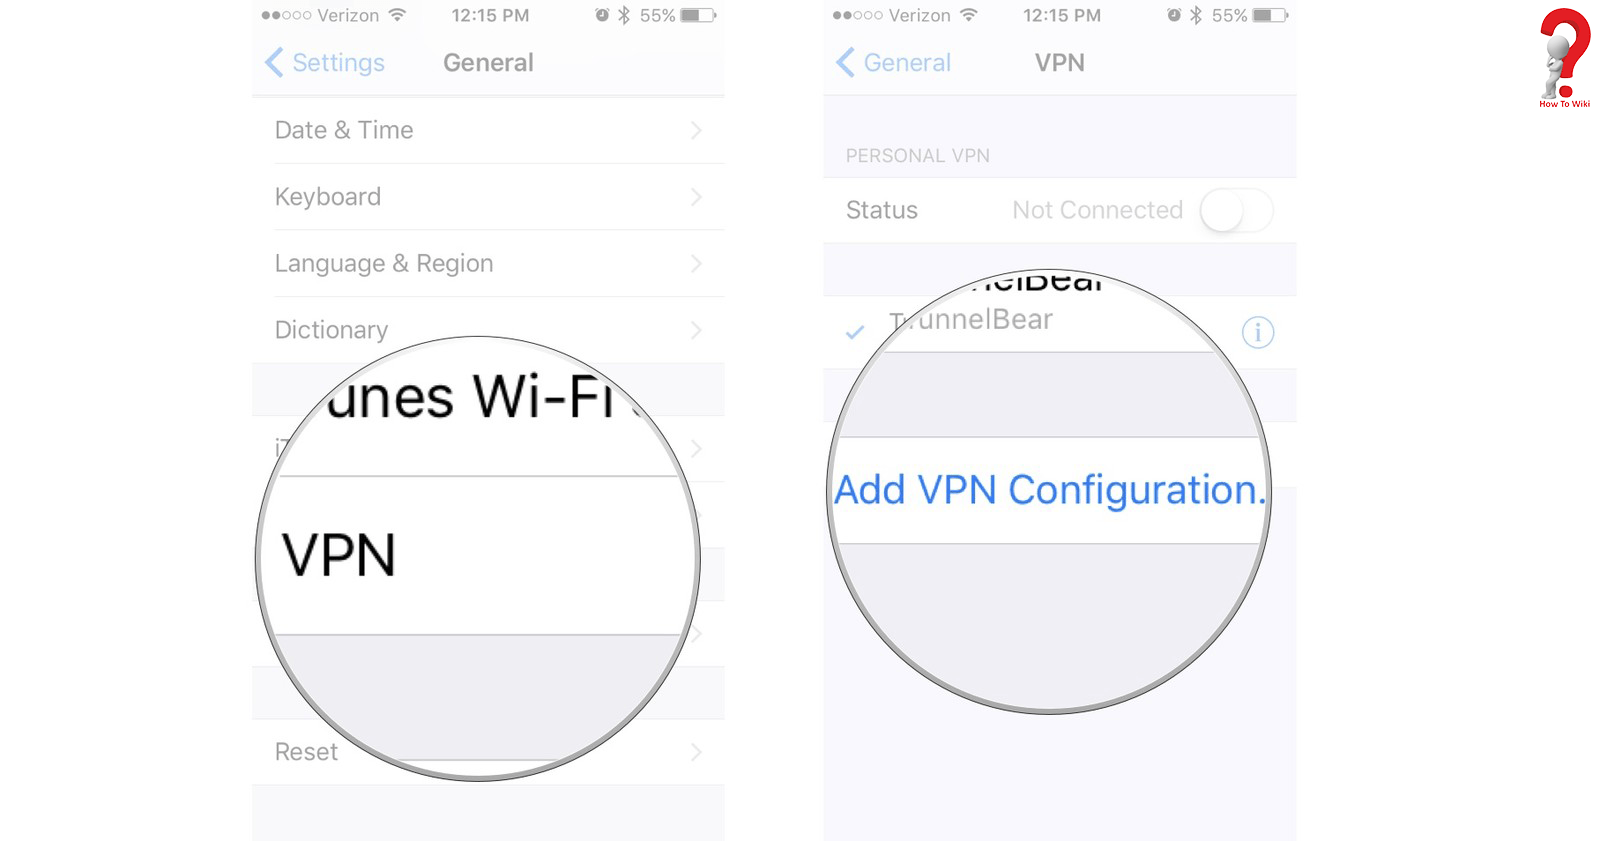
#1 CLick on the settings application from the homescreen of your iPhone
#2 Go to the General settings page in the phone
#3 Select the iPhone VPN Settings option
#4 Now you have to tap on the option called Add VPN Configuration
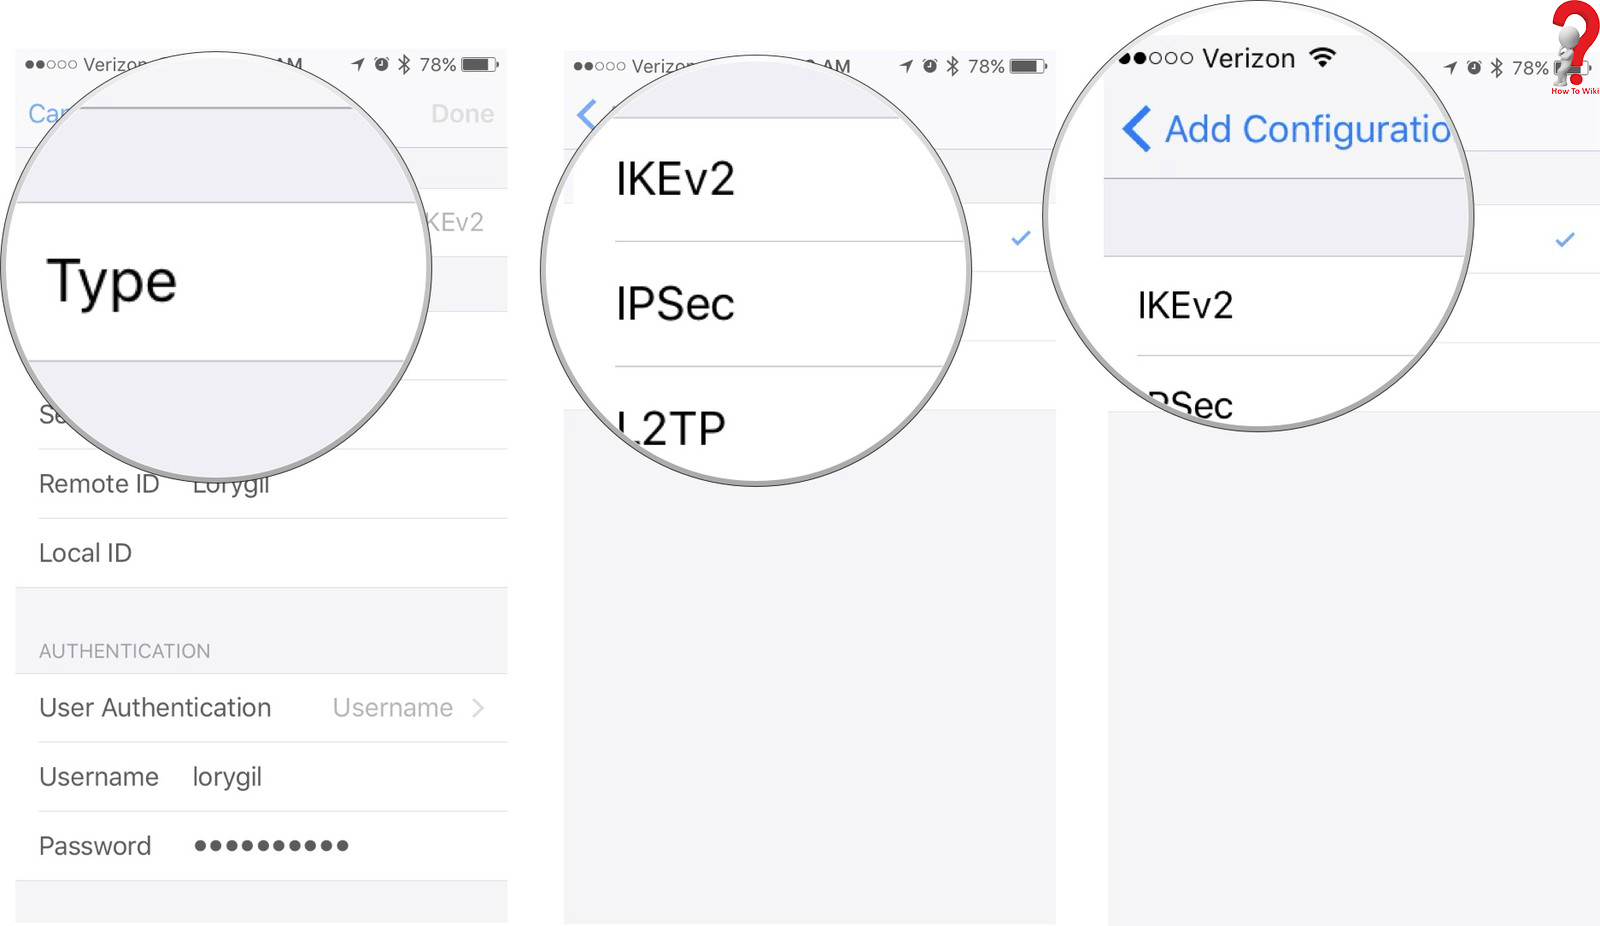
#5 There you will find a fill out the form for the Type of VPN
#6 Here select your VPN type
#7 Now you must click on the icon for “Add this configuration”, this will take you to the previous screen
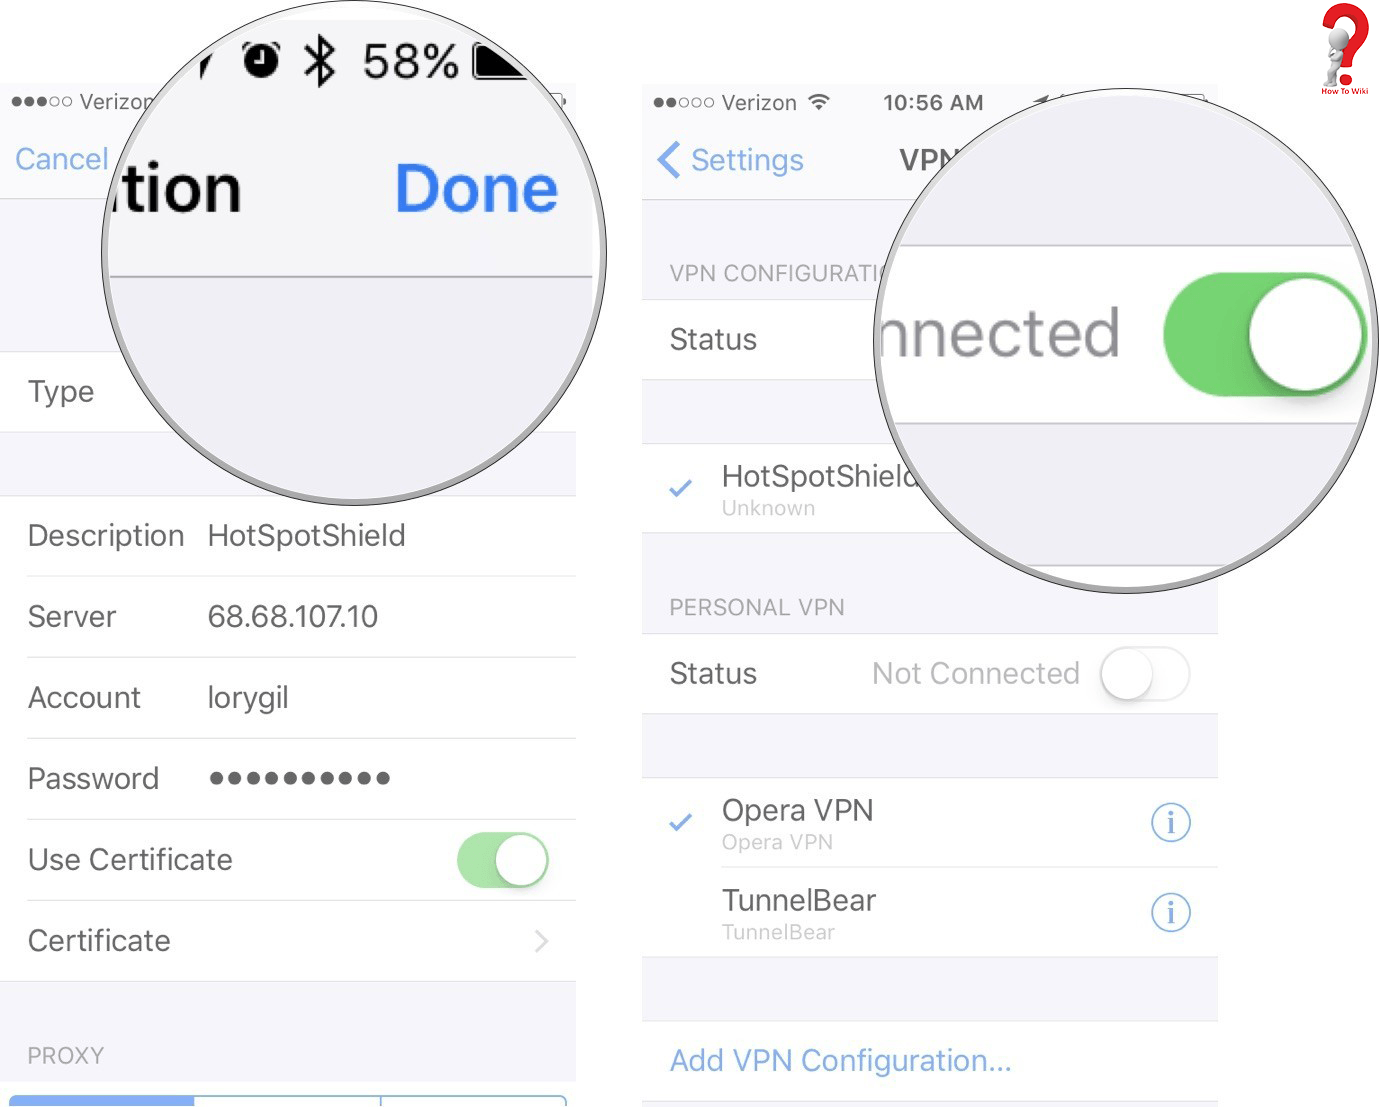
#8 Enter all the VPN setting information like the description, server etc.
#9 It will ask for the authentication, put in your username and password
#10 For proxy, enable it
#11 After you have completed the above steps, tap on Done
#12 Do not forget to turn on the status switch
List Of Best Free Unlimited VPN For iPhone
There are many Best VPN for iPhone out there for you to use, and most of them are free to use. Usually, a VPN client provides you a free 500 MB to 1 GB data, to use it when you need to mask your private information, especially when using a public WiFi connection. But you can always extend your limit by paying as low as 10$ every month for unlimited data protection.
Here is why you must use Free VPN Configuration For iPhone, reasons other than security and privacy ~
#1 You can access all the restricted websites in your area when you connect to a VPN client. This is because now your IP is changed and you can access the content from the new IP that the VPN is providing
#2 VPN is a boon for travellers because in some countries they do not get access to all the content on the internet. So, to be able to access the data from back home, or watch some amazing shows from their country, they can enable VPN in their devices.
So this was the way to enable Free VPN for iPhone; if you liked it do comment to us, and don’t forget to share it with your friends.

