First of all, handstands are pretty cool. There are a few essential basic concepts that go into performing the movement at first. You should know that no one learned the handstand on their first try. When you fail, you only need to learn from the attempt. Little kids fall many times when they are trying to learn how to walk. They always try again, and eventually, they learn.
The same thing should apply to you and the approach to performing this exercise. It will teach you how to breathe properly, your posture will be corrected, and you will develop true strength in your upper body. If you want to include more core, you can also try out new variations to see just how far you can go. Click here to read more.
The Essential Concepts
There are many different approaches, and all of them are correct if you end up with a positive result in the end. Thousands of people know how to do it, and there are frameworks that you can follow to do it faster.
Before you start, you should know that it takes a lot of time and effort, but you will master it in a few weeks with the correct strategies. Preparation always comes first. You need to get the blood moving throughout the body, and you need to warm up the wrists, shoulders, core, and neck.
This is a pretty intense exercise, so the warmup is mandatory before you start. As soon as you start breaking a sweat, it is time to practice. This exercise is more of a skill, and when you break it down into smaller parts, it seems easier to do. You spend a bit of time on each part, and eventually, you will combine them all together.
Additionally, there’s always room for play, and you have the complete freedom to try out movements and positions on your own. You should not be rigid and follow every program like it is a timetable at work. Instead, get loose and do what feels right.
In the end, take some time to reflect on what you did well during the practice and what can be improved. There are no mistakes, only opportunities from which you can learn. Follow this link for more info.
How To Warm Up?

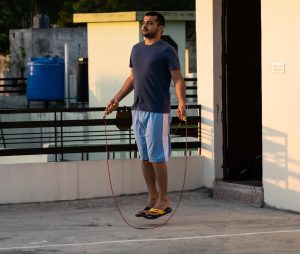
An easy way to get warmed up is a little bit of cardio. It is not going to take away anything from your strength. It is probably going to increase it. Jump some rope for a minute, and then rest for 15 seconds and do it again.
That is only two minutes of work, and it is going to give your wrists the essential mobility you need for the later exercises. Full arm circles after you complete the skipping rope is great because they activate your shoulders. When you finish both, it is time to get on the floor and press into your hands.
Start pressing hard, and move your body forward and back, exerting pressure. Also, do some elbow rotations while you are warming up. Keep the elbows fully locked to avoid injuries. If you start feeling pain in the warmup, do not continue with the practice.
Take a day off and try again tomorrow. It is not a race to learn the skill. It is a marathon. Make sure everything feels good before you transition into intensive work.
Progressions

Handstands are quite intense on the shoulders if you have not been to the gym for more than a year. Learning How To Handstand usually takes three to four months. Take some time at first to be able to do some pushups. Start by doing ten, and then work your way for more.
When you can do thirty pushups without that much pain, you are ready to progress into the journey. Start by placing your hands on the floor, just like when you are getting willing to do some pushups but have a bed or a chair nearby.
Put your legs on the chair or the bed, and then raise your pelvis into the air. Your back should be in a straight line, and all the pressure will be in your hands. A bit of blood will come to your head, and with time, you will get used to the feeling.
If you start feeling dizzy at any point, stop and take a few minutes to breathe. When you feel comfortable holding the position with both legs on the chair or bed, find something higher, like a desk to put your feet onto. This will be a bit harder, and with a few days of training, you will progress even further. Next comes the real practice – the wall.
The best way to train with a wall is barefoot, but wearing shoes is good too if they do not slip. Now you will find out why all those pushups were worth it. Get to the wall and face the opposite side. This means that your back will be touching the wall.
Then, drop down like you are going to do a pushup, and place your feet on the corners, barely touching the side. When you get comfortable, move your feet up on the wall, and move your hands back to help with the movement. The entire workout should look like you are climbing on the wall backward.
If you feel like your arms are going to give out at any moment, push your legs away and land safely. Practice getting out of the position when you still have some strength left. That is going to be helpful if you ever need it. With time, you will be able to touch the wall with your nose, and your legs are going to be completely vertical.
Congratulations, you are almost done. As soon as you get to this stage, the core needs to become more involved. When you are in the vertical position, try moving your legs away an inch. Finding the balance is going to be crucial and pressing all your fingers is quite useful and helpful at this stage.
From here on out, it becomes a feeling. You will squeeze the core when you lose balance and release it when you feel comfortable. With time, the entire exercise will feel effortless.
